Creating an end-to-end encrypted chat with Stream and Seald 🔒💬
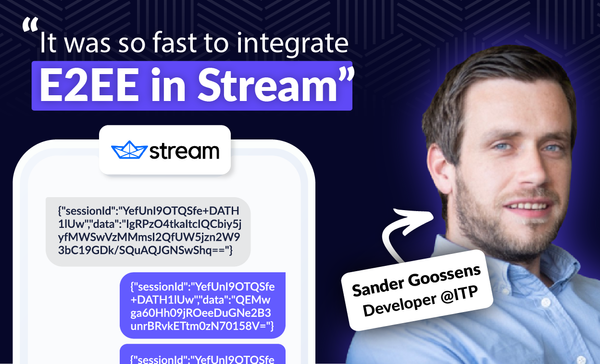
The original post was written by Sander Goossens, developer at In The Pocket, you can find it here: https://dev.inthepocket.com/posts/2022-02-15-creating-an-encrypted-chat-with-getstream-and-seald-io/
Sander Goossens: Recently, a client came to us asking for a chat solution with encryption support. After some research, we quickly came to a combined solution of GetStream.io and Seald.io.
GetStream.io offers real-time chat messaging with a reliable chat infrastructure and feature-rich SDKs. One of the main selling points of GetStream.io is the availability of UI components out of the box. With support for React Native, React, Android, Flutter, iOS/Swift,... you can quickly create a chat application without the hassle of creating every UI interaction yourself.
Seald.io offers end-to-end encryption in Europe. The solution benefits from a security visa (CSPN) issued by the ANSSI, which ensures you a robust security model. CSPN is the certification of Seald's level of robustness, based on compliance analysis and advanced penetration testing.
End-to-end encryption is the most secure technology available, but it is also the most complex and time-consuming to implement (key management, user account recovery, etc.). To simplify its adoption, Seald has developed an SDK associated with an API, which allows you to add end-to-end encryption to your applications in a few lines of code, without any prior knowledge of cryptography.
Because of the APIs and components SDKs made available by Stream, we can hook the end-to-end encryption of Seald into it.
Enough introduction, let's see what we are going to build and how we approached this!
Goals
- Chat messages should only be readable by the members of a conversation
- Chat messages should not be readable in the Stream admin dashboard
Services
Messaging APIcustom nodeJS backend to handle all GetStream and Seald server side functionality. Has a postgreSQL database where we store seald users.Users APIcustom nodeJS backend to handle everything concerning users.

Now to the actual implementation
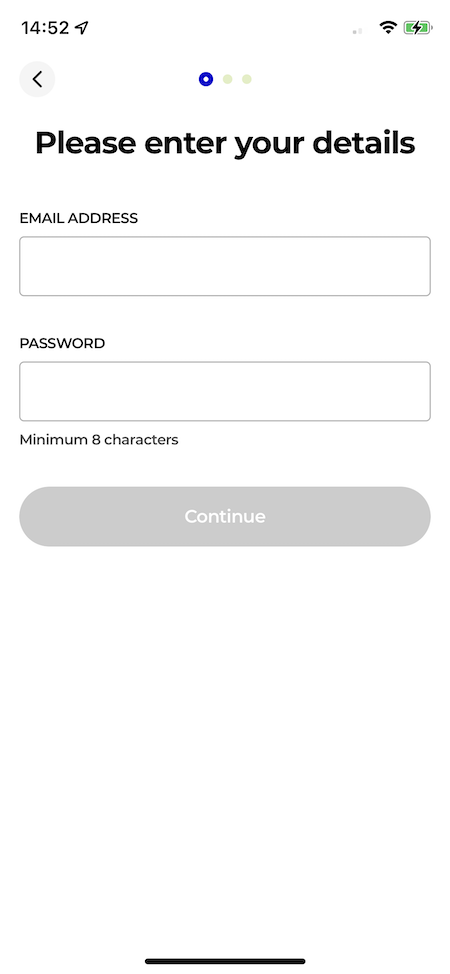
Let's start our application with a registration screen where the user can enter their details. When a user successfully registers, we can authenticate him/her with our authentication provider.
The authentication providers returns with a JWT code that can be used across our full application.
{ "accessToken": "eyJ2ZXIiOiIxLjAiLCJraWQiOiIzYWMxMTjYwZi0yMzhm..."}
We would like to connect the user to the GetStream servers, thus we need to fetch a JWT token from GetStream. An endpoint in our Messaging API will handle this. Use the user ID from your authentication provider to create a token at GetStream.
import { StreamChat } from 'stream-chat';
const serverClient = StreamChat.getInstance(STREAM_KEY, STREAM_SECRET);

export async function getMessagingToken(id: string) {
  return serverClient.createToken(id);
}
We will store this messaging token inside our react-native application. We are using Zustand ❤️ for this. Using this token, we are now able to connect a user to our GetStream client.
const client = StreamChat.getInstance(config.stream.apiKey);

 const init = useCallback(async () => {
    try {
      // First disconnect any user that was still connected.
      await client.disconnectUser();
      await client.connectUser(
        {
          id: connectedUserId,
        },
        // Use the JWT token received from our messaging API endpoint.
        messagingToken.accessToken,
      );

      logger.verbose('ChatClient initialized');
    } catch (error) {
      logException(error);
    }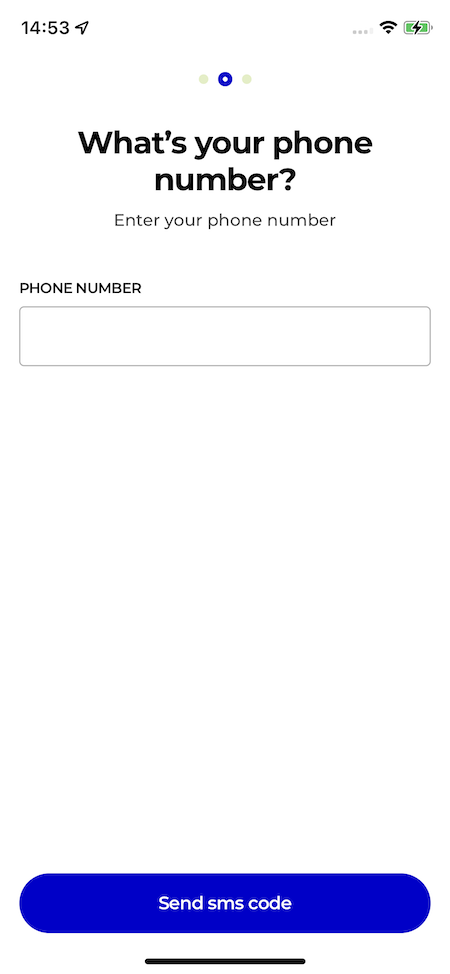
}, [messagingToken, connectedUserId, client]);Let's continue to the next step in our onboarding process. We now need to initialise our 2FA with Seald. We created a screen where the user can enter his/her phone number.
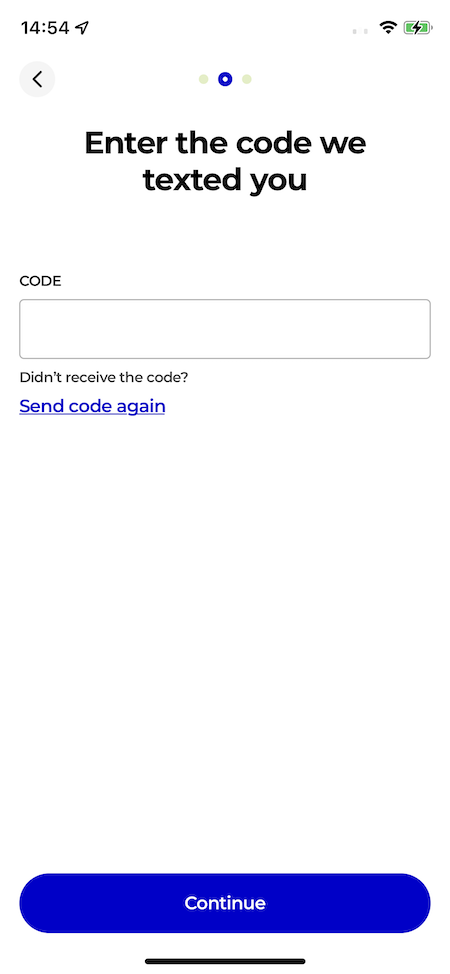
When a user enters their phone number, we need to send a challenge that the user can enter on the following screen. We created a custom hook useTwoFactorAuth to handle the setup of 2FA.
For doing actual API calls, we use react-query. I will not deep dive into every custom hook, the 3 hooks below are fetching some data with react-query from our API endpoints.
const { signup, isLoading } = useSignupSeald();
const { fetchMe, isLoading: isLoadingFetchMe } = useMeSeald();
const { sendChallenge, isLoading: isLoadingSendChallenge } = useSendChallenge();
When a user does not yet exist, we call the signup endpoint. This endpoint will make sure that the user is saved in our postgreSQL database and that a TwoManRuleKey is created and stored in our database. To know more about the protection with the 2-man-rule, you can check the docs.
  const setup2FA = async (phoneNumber: string) => {
    let user: OnboardedUser;

    try {
      // The messaging API will be called to fetch an existing seald user, this is needed because the login will also execute this setup2FA hook.
      user = await fetchMe();
      // It's possible that the user early killed the application while the signup was still busy. If we were not able to
      // store an activation key, we need to signup the user again to receive one needed for the initiation of the identity.
      if (!user.activationKey) {
        user = await signup();
      }
      // eslint-disable-next-line @typescript-eslint/no-explicit-any
    } catch (error: any) {
      // User does not exist
      if (error?.error?.type === MessagingApiErrorType.USER_NOT_FOUND) {
        user = await signup();
      }
    }
  };
For seald to be able to work properly, we need to generate a user licence token in our backend. See docs for more information on how to do this. Whenever the endpoint to fetch the user or to signup the user is called, a licence token will be generated and returned by our API.
When an existing user returns, the fetchMe endpoint will return the following response:
{
   "id":"0015r00000OxGgIAAV",
   "isEnrolled":true,
   "sealdId":"TESTING_0015r00000OxGgIAAV",
   "twoManRuleKey":"VCl2Z0U+LYZ6Fq2rjm40PFrYWlrLDIsSRgGufKo9wJGlxDAU+5mUwji21g2G86GzN3dLKsrdWmYbPZn0QTGa9g=="
}
When a new user is created during signup, the response from the signup endpoint will be:
{
   "activationKey":"dbbb72c5-b2c5-47db-ad4c-5dfec91918df:5b1f82d5f3cb073c0103a4aa55bdd900777a4b3b4b89b99d906af533f3358a6e:7f24176eff547227984710ac5b2d858b3a78af509225f5b6cdc41197254dd81a02b16d893b176ffd70c952b87c4ba95a1f98b9f0bc3d0926f117e832fa45a9f3",
   "id":"0015r00000Q0DQcAAN",
   "isEnrolled":false,
   "sealdId":"TESTING_0015r00000Q0DQcAAN",
   "twoManRuleKey":"miSTd8ad7FrtvNSMee+uLDLgj+tYCPf9iENm3CzsytILSw5YuMI1TEOtEF7sU46f4qa6KVF+wb3tU1cdbLzTBA=="
}
Now that our user is created, we can send the challenge to the user and initiate the seald identity with the activation key.
 if (user) {
      // The activation key is the user licence token from seald.
      const { sealdId, activationKey } = user;

      // Create session in seald, send challenge to user.
      await sendChallenge({ phoneNumber });

      if (sealdId && activationKey) {
        await seald.initiateIdentity(sealdId, activationKey);
      }
    }
The sendChallenge will call our Messaging API endpoint that implements the sending of a challenge according to the specifications. Seald will create a "session" and this session will be required in the save or retrieve of our seald identity.
{
   "mustAuthenticate": true,
   "twoManRuleKey":"miSTd8ad7FrtvNSMee+uLDLgj+tYCPf9iENm3CzsytILSw5YuMI1TEOtEF7sU46f4qa6KVF+wb3tU1cdbLzTBA==",
   "twoManRuleSessionId":"c1c2b55f-f119-4a88-8a0d-e95512e3c667"
}
We can now continue to our last screen for entering the challenge.
A custom hook will be called when the challenge was entered:
export const useSaveOrRetrieveSealdIdentity = () => {
  const { updateUser } = useUpdateUser();
  const { enroll } = useEnroll();

  const sealdId = useStore(state => state.sealdId);
  const twoManRuleSessionId = useStore(state => state.twoManRuleSessionId);
  const twoManRuleKey = useStore(state => state.twoManRuleKey);
  const mustAuthenticate = useStore(state => state.mustAuthenticate);
  const userEnrolled = useStore(state => state.isEnrolled);

  return {
    saveOrRetrieveIdentity: async (phoneNumber: string, challenge: string) => {
      // Store phone number for later login purposes.
      await updateUser({ c_recoveryPhoneNumber: phoneNumber });

      // If user was already enrolled, the identity already exists so we need to retrieve it.
      // SSKS will be called, and the identity will be retrieved.
      if (userEnrolled) {
        await seald.retrieveIdentity(
          sealdId,
          twoManRuleSessionId,
          twoManRuleKey,
          challenge,
          phoneNumber,
        );
      } else {
        await seald.saveIdentity(
          phoneNumber,
          twoManRuleKey,
          sealdId,
          twoManRuleSessionId,
          mustAuthenticate,
          challenge,
        );

        if (!userEnrolled) {
          enroll();
        }
      }
    },
  };
};
We now have established a secure identity and can use this identity to create secure sessions between two users 🙌

Creating a secure chat
GetStream.io offers us very fine UI components that easily integrate in our react-native application. We have modified some components of GetStream, but in this example I will only show the necessary things.
When creating a screen for the chat, you can start with a basis implementation like this:
  import { Channel, Chat } from 'stream-chat-react-native';

  const client = StreamChat.getInstance(config.stream.apiKey);
  const channel = client.channel("messaging", id, ["member1", "member2"]);

  return (
    <Chat client={client}>
        <Channel channel={channel} /> // Channel you created between two members.
    </Chat>
  );
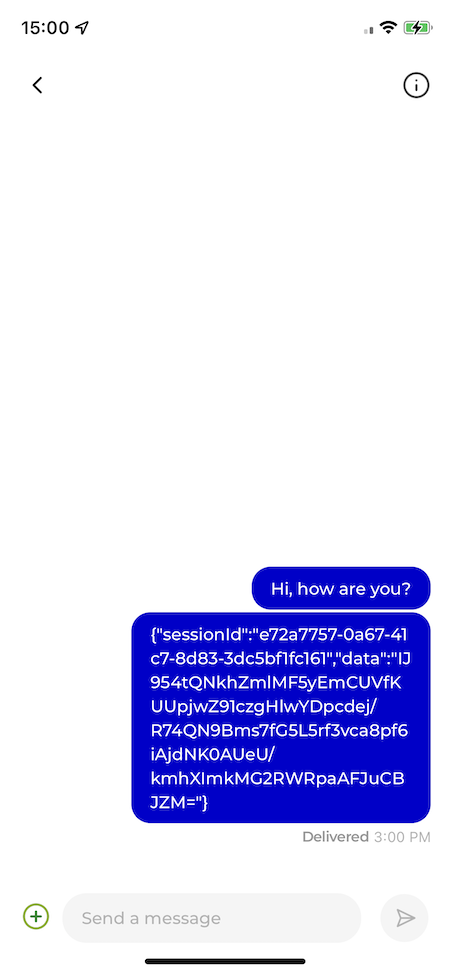
Without encrypting/decrypting any messages, the chat will look like this:

But we want to be able to send messages encrypted. Therefore, we need to override the doSendMessageRequest method. As you can see, we encrypt our message using an encryption session. This encryption session needs to be created when creating your channel.
When an encryption session between two users is created, we store the session ID on our channel metadata in getstream, so it can be reused to fetch an encryption session.
const channel = client.channel("messaging", id, ["member1", "member2"]);
  await channel.watch();

  let session: EncryptionSession;

  if (channel.data?.session_id) {
    session = await seald.retrieveEncryptionSession(channel.data.session_id);
  } else {
    session = await seald.createEncryptionSession(members.map(member => member.sealdId));
    await channel.updatePartial({ set: { session_id: session.sessionId } });
  }

  const sendMessage = async (_channelId: string, message: Message) => {
    const encryptedText = await encryptionSession.encryptMessage(message.text || '');
    return channel.sendMessage({ ...message, text: encryptedText });
  };

  return (
    <Chat
      client={client}
    >
        <Channel
          channel={channel}
          doSendMessageRequest={sendMessage}
        />
    </Chat>
  );
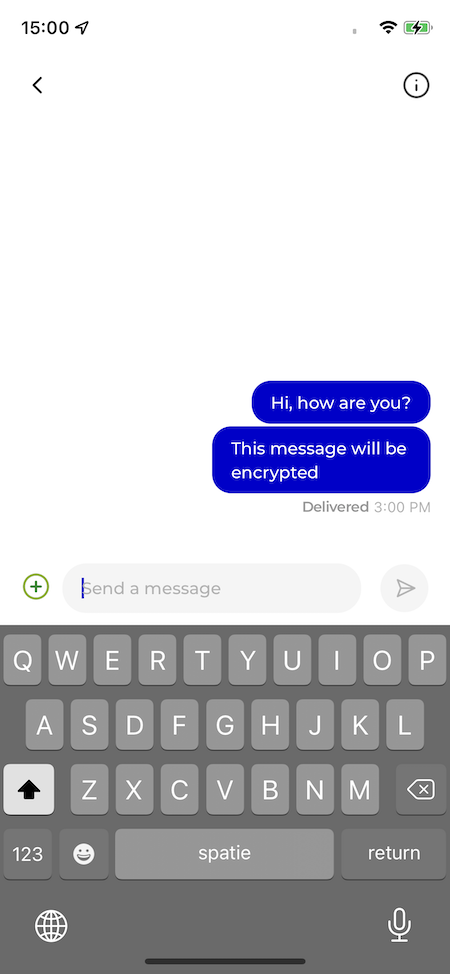
If we send another message now, you can see that the message text is now encrypted and unreadable.
We need to override the MessageText component to show an unencrypted message.
return (
    <Chat
      client={client}
    >
        <Channel
          channel={channel}
          doSendMessageRequest={sendMessage}
          MessageText={(props: MessageTextProps) => (
            <DecryptedMessageText
              {...props}
              channel={channel}
              session={encryptionSession}
              onError={handleDecryptionError}
              onFinished={handleDecryptionEnd}
            />
          )}
        />
    </Chat>
  );
Our DecryptedMessageText component will use our encryption session to decrypt the message.
import { useEffect, useRef, useState } from 'react';
import { useTranslation } from 'react-i18next';
import type { EncryptionSession } from '@seald-io/sdk/lib/main';
import type { MessageTextProps, MessageType as Message } from 'stream-chat-react-native';

import type { LocalChannel } from 'core/chat/types';

interface Props extends MessageTextProps {
  channel: LocalChannel;
  session: EncryptionSession;
}

const decryptMessage = async (text: string, session: EncryptionSession) => {
  try {
    // If we have  JSON, it can be decrypted.
    JSON.parse(text);
    try {
      if (!session) {
        throw new Error('EncryptionSession is undefined');
      }
      return await session.decryptMessage(text);
    } catch (err) {
      logException(err);
      return false;
    }
  } catch (err) {
    // Otherwise it's just plain text
    return text;
  }
};

const DecryptedMessageText = ({
  channel,
  session,
  message,
  renderText,
  theme,
  ...rest
}: Props) => {
  const { t } = useTranslation();
  const decryptedMessage = useRef<Message>(message);

  useEffect(() => {
    const decrypt = async () => {
      if (message.text) {
        const text = await decryptMessage(message.text, session);
        if (text === false) {
          // Handle errors
          return;
        }

        decryptedMessage.current = {
          ...message,
          text,
        };
      }
    };

    decrypt();
    // eslint-disable-next-line react-hooks/exhaustive-deps
  }, [message, session]);

  return renderText({
    ...rest,
    message: decryptedMessage.current,
  });
};

export default DecryptedMessageText;
Our message is now decrypted, and again visible for the members of the conversation.
When we take a look at the GetStream.io dashboard, we can also see that our messages are not readable, and so are securely encrypted 💪

Conclusion

ps: you use PubNub instead of Stream? Here's an article that explain how to integrate E2EE in PubNub.